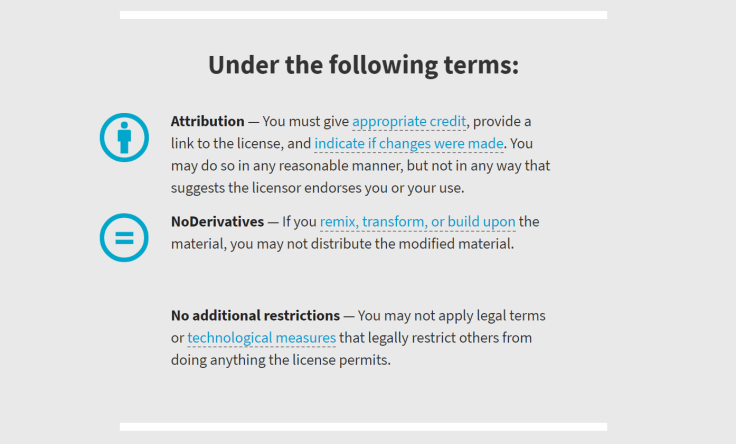
I picked this because it prevents people from changing my work before using it. This should allow people to use my work such as my pictures but they are not allowed to edit them and publish them. I decided that this was the most appropriate as my video has one of my classmates in and also I would rather that my pictures including ones of me are not changed without my permission.
This copyright also means that if people do use my work they have to credit me (Beth Frangleton) for it
Below is a screen shot of the bottom of my blog. I added a widget containing my copyright terms so that it is in more places than just in this post hopefully making it clear to any viewers of my site.
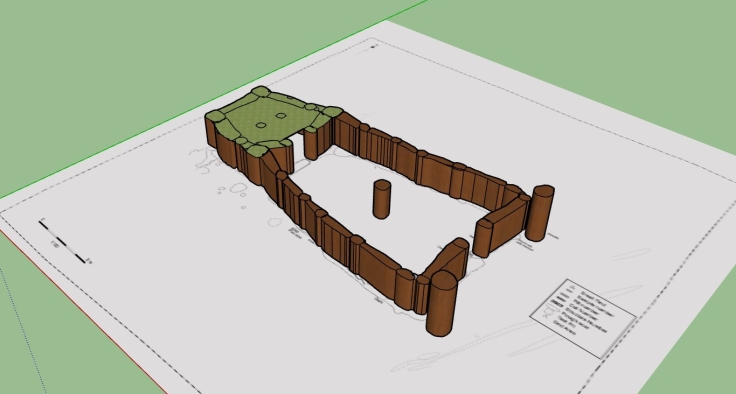
This week I had my first go at reconstruction. We were given the details of a site near Stone Henge called Cat’s Brain. This is an early Neolithic building found in a long barrow. As an introduction to this activity we were given a brief overview of the site by Dr Jim Leary (Leary 2018) who directed the excavation (University of York Department of Archaeology). I made some notes for this sepecifically with the reconstruction in mind. For example I wrote that there were deep pits at the front possibly for a large facade, it was probably a large community hall which wasn’t lived in nd would have had timber walls.
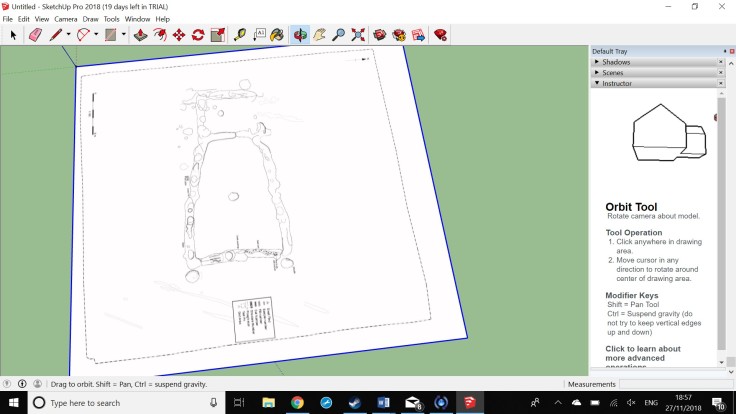
We were given a plan of the site to import into a software program called SketchUp.
Here is what it looked like:
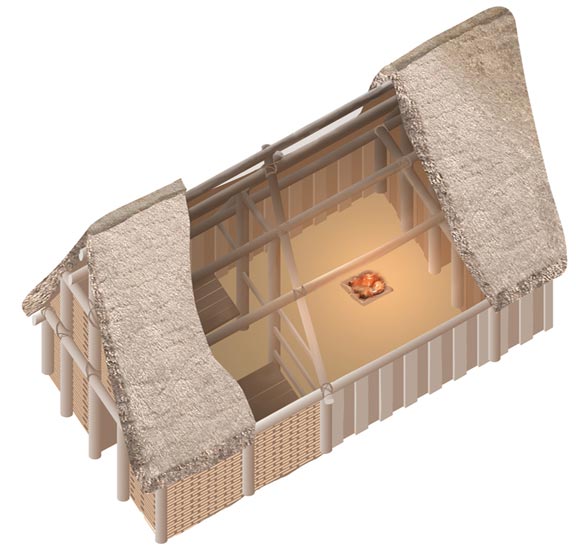
Before I built my attempt at a reconstruction I looked at some other examples of reconstructed Neolithic houses. Here is Colleen Morgan’s interpretation of Cat’s Brain:
Cat’s Brain by Colleen Morgan
I also found an interesting page by Wessex Archaeology which I will link at the bottom of this page. Here they explain how they made decisions to create a reconstruction of a Neolithic house which they had found. The video is a bit grainy but this is what they came up with: Wessex Archaeology Reconstruction. They made important points such as the only tools available would have been made from wood, stone or bone and they suggested that the walls would have been solid oak sort of made into planks with a turf of thatch roof.
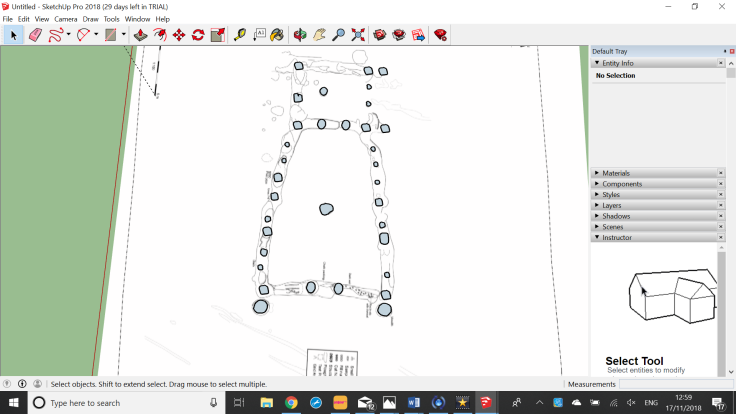
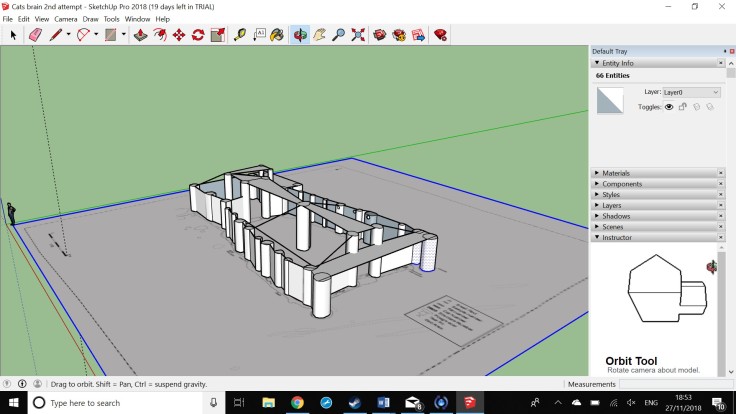
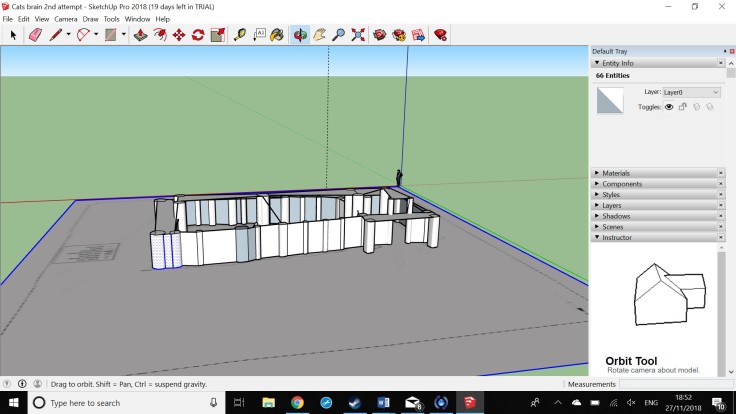
I had too different attempts at reconstructing this. As you will see I struccled lots with the roof… I only added colour to my first attempt. To make mine i began by drawing in where I thought all of the post holes would be, I used the plan as a guide and added extras where there was a hole on one side but not the other:
I then raised the outside post holes to 2 metres and the middle ones to 3 metres using the push/pull tool. For my two different attempts I made the walls differently. In my first try I drew the base free hand following the shape of the ditch in the plan and then pulled it up to the height of the walls. For my second attempt I used the rectangle tool and just joined up my poles:
Attempt 1
Attempt 2
I then used the paint tools to add materials. I only did this for my first attempt giving wooden walls and a flat turf roof because I couldn’t work out how to do a proper roof!
Attempt 1
In my second attempt I experimented by putting in a second entrance way. I tried to give a bit of a porch to explain the poles which were in front of the entrance way. Again the roof would not do what I wanted it to so I gave up!
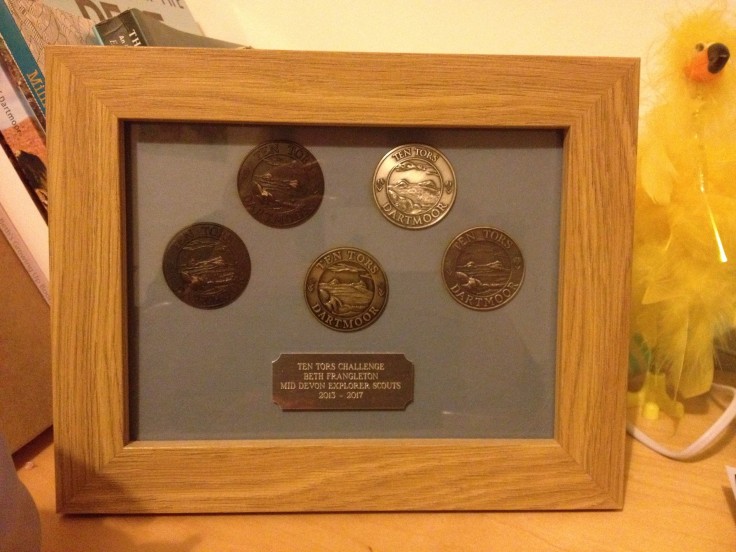
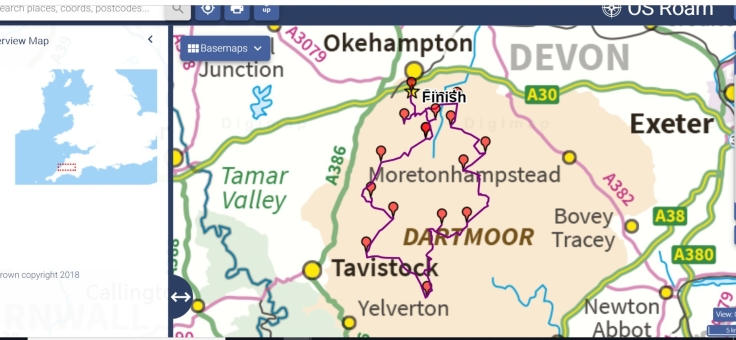
For my map I decided to make one of a route I walked on Dartmoor for a challenge called Ten Tors. This is an event which happens every year where young people walk 35, 45 or 55 miles in teams of 6 over a weekend carrying their full kit (Ten Tors Website). I went to school in the town where it starts so I ended up doing it 5 times! 35 miles twice, 45 miles twice and 55 miles once.
My Ten Tors medallions!
This a link to all of the 45 and 55 mile routes. My map is of route O because this was my first 45 route which I did in 2015. I began by marking all of the checkpoint on the ordinance survey map and adding lines of the route.
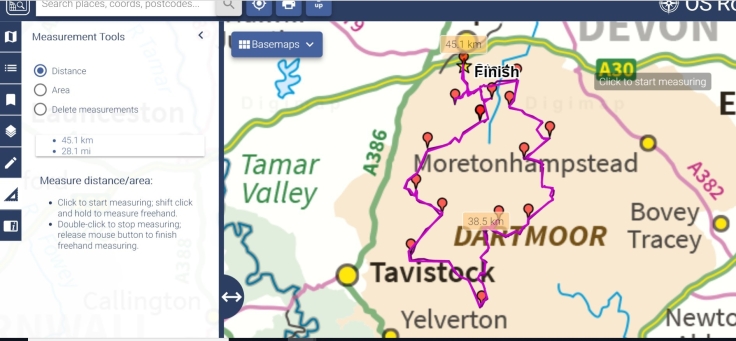
I then used the measuring tool to roughly trace the route I had marked. The results of this are shown in the below screen shot. My tracing showed that the total distance was 38.5km + 45.1km giving a total of 83.6km. I converted this into miles giving 52.25 miles! This shows that the total distance you walk often ends up being further than it is supposed to be!
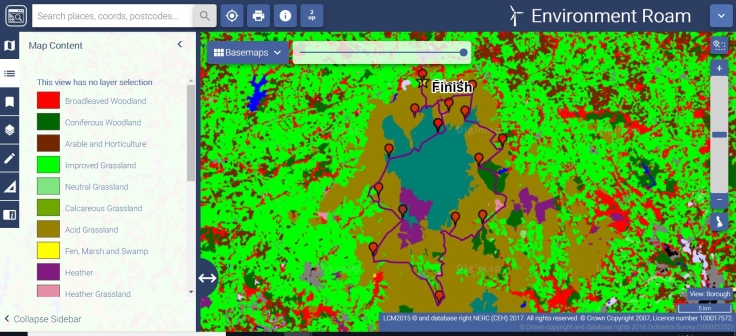
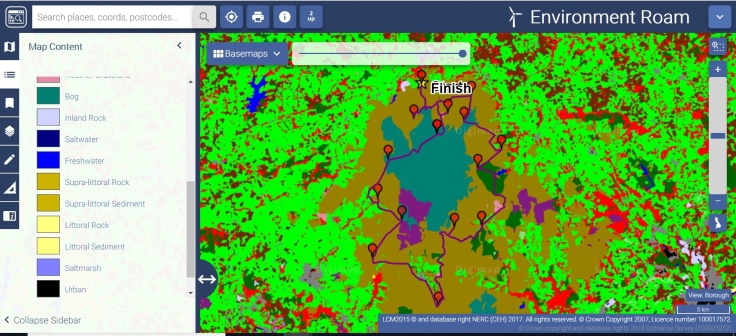
I then decided to play around with the other map options on digimap. I put my route in the environment setting which showed that everywhere I walked was either bog or acid grass! I knew this from walking it but it was interesting to see it officially.
I also looked at the historic maps. These haven’t changed much but I found it interesting that in the 1960s contour lines were added but weren’t on the 1980s map. Contour lines are really helpful when planing a route so I wonder what caused these changes in map production. It might have depended on what the person making the map thought was important.
This slideshow requires JavaScript.
I enjoyed this week because it gave me the chance to explore all of the different things that map databases can be used for.
Film is a good way of sharing archaeology to a wide audience – more people are probably going to watch a documentary about a piece of research than find and read an article. However, we have to remember that things like this are not created solely by the researcher as an article might be and are designed to entertain. Some things we watch could have undergone lots of editing and not be a completely true representation. In an article called ‘TV and the Near Eastern Archaeologist’ by Eric Cline (2008), Cline describes a conversation with the producer for a TV producer. He makes some interesting points such as topics for programs being constrained by what people watch.
In this workshop we formed groups of three to create interviews. We were told to pick any archaeology related topic and prepare three to five questions each. In my group we decided to ask each other about the topic we had chosen for an article we had to write for another one of our modules. This meant that we would be talking about a topic which we were interested in and that we knew quite a lot about.
We didn’t have very long to prepare our questions before we had to video our interviews. We used the same cameras which we used in our photography workshop with a microphone on top. For our interviews we had to choose a suitable location, this proved to be more difficult than we thought it would. We originally planned to film ours on a bench in the museum gardens with the St Mary’s abbey in the background however when we watched back the interview of me the sun was really bright on one side of my face which looked really weird! We decided to move back to Kings Manor because at that time of day it was in the shade. We chose another nice bench with King’s Manor in the background. Unfortunately, half way through the interview someone started using the hand dryers in the toilets which was too noisy. We ended up moving inside to the room where our workshops are held, we moved the wires and computers out from the background as best as we could and positioned a nice image.
If we had had a bit more time we probably could have found a better location for our interviews but I think they worked out quite well.
I was in charge of filming Izzy who was talking about evidence for celiac disease in prehistoric people.
I edited my video, adding a text caption of the questions asked at the bottom of the video while the answer was being given so that the viewer would remember what it was. It then uploaded this to Youtube. It would be interesting to compile our videos together because they turned out pretty well. They would make a good record of the world archaeology module and could be used to inspire future students on what topic their article could be on. We were asking each other about topics we are interested in and this made the videos interesting to the viewer.
Unfortunately I used a trial version of Windows Movie Maker to edit my video so it has a watermark across it.
Bibliography:
Cline, E., (2008). TV and the Near Eastern Archaeologist. Near Eastern Archaeology, 71(3), pp.172–174.
In this weeks workshop we were doing photography. Before I talk about what it is that I did it is important to note that photography is not as objective as people may assume that it is. A photograph can be taken for many different reasons meaning that pictures taken by different people of the same thing can represent different ideas (Shanks 1997). One photographer may have been focusing on the scenery, another may have been recording the ruins of a castle in the foreground and another may have been photographing their family stood in front of the castle.
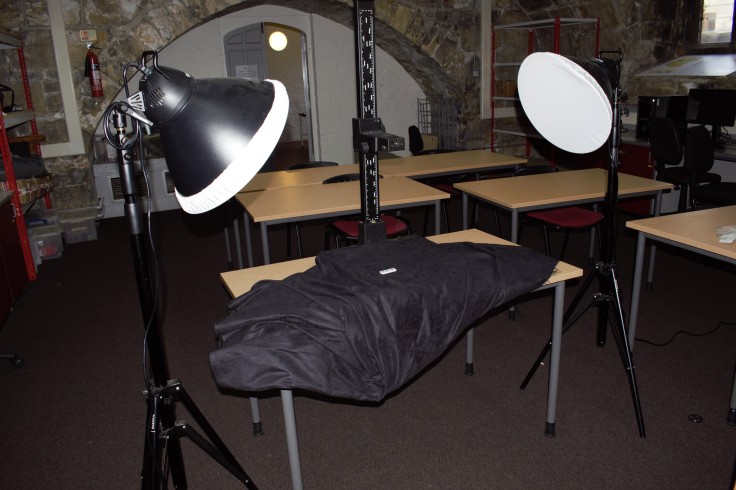
In the workshop we began by photographing an artefact. For my artefact I decided to photograph the Roman potsherd which I drew last week. Below is an image taken by my friend Natalie Harris of the set up which we used for our photo.
Photography set up: Photo by Natalie Harris
To take the photo I placed it on the black cloth as a background. I put a scale alongside it and in my photo did my best to line the scale up with the frame of the shot. I decided to experiment with the lighting and took a photo with both lights on, one light on and no lights on. Below are the results:
This slideshow requires JavaScript.
We then went outside to take photos of Kings Manor. These were a mixture of archaeological photographs and non-archaeological photographs.
So what makes an archaeological photograph?
General conventions of archaeological site photographs are that they MUST have a scale, most of them will also contain a photoboard (saying what the photo is of) and a north arrow. Archaeological photographs should also be clear of distractions such as people and excavation tools. (Archaeology Skills Passport 2018)
Here are my archaeological photographs – one of the calf in Kings Manor and one of a bin!
In both of these photos I have included a scale bar which is in line with the frame of the shot. Ideally there would be a North arrow but I did’t have one also, the photo of the bin has people in the background if you look closely – I didn’t have time to wait for them to move.
Here are my non-archaeological photos, one of the calf and one of the Centre for Medieval Studies:
I have put filters on them which distort the images slightly, they are also taken at an angle instead of straight on to the camera and wouldn’t be very useful in the archaeological record.
Shanks, M. (1997) Photography and Archaeology. In B. L. Molyneaux, ed. The Cultural Life of Images: Visual Representation in Archaeology. London: Routledge, pp. 73–107.
“Field drawing is the last form of recording
where much of the work is still done by hand” (Morgan and Wright 2018, 136)
This is one of the reasons why illustration is important in archaeology. A drawing can show different aspects of things than a photograph and the act of drawing helps the illustrator to fully understand the subject matter. It takes much more time and thought to create an illustration than a photograph so it causes the illustrator to think more about what they are looking at. From a site illustrations will be one of the main records of the archaeology before it is covered back up or even destroyed!
There are different types of archaeological drawings. On a site you are likely to see plan drawings and section drawings. The names of these are quite self explanatory, below are some examples of plans which I have drawn, one from Malton and one from Ipplepen.
In this workshop I drew an artefact. Common ways of drawing artefacts are sketches and scale drawings.
The purpose of illustrating is:
” – to produce an accurate and detailed record that can be used for comparison
– to emphasise aspects of the object that the specialist has identified, (eg: maker’s mark).
– to inform others – images are often a simpler form of communication than text.” (Small 2013, 4)
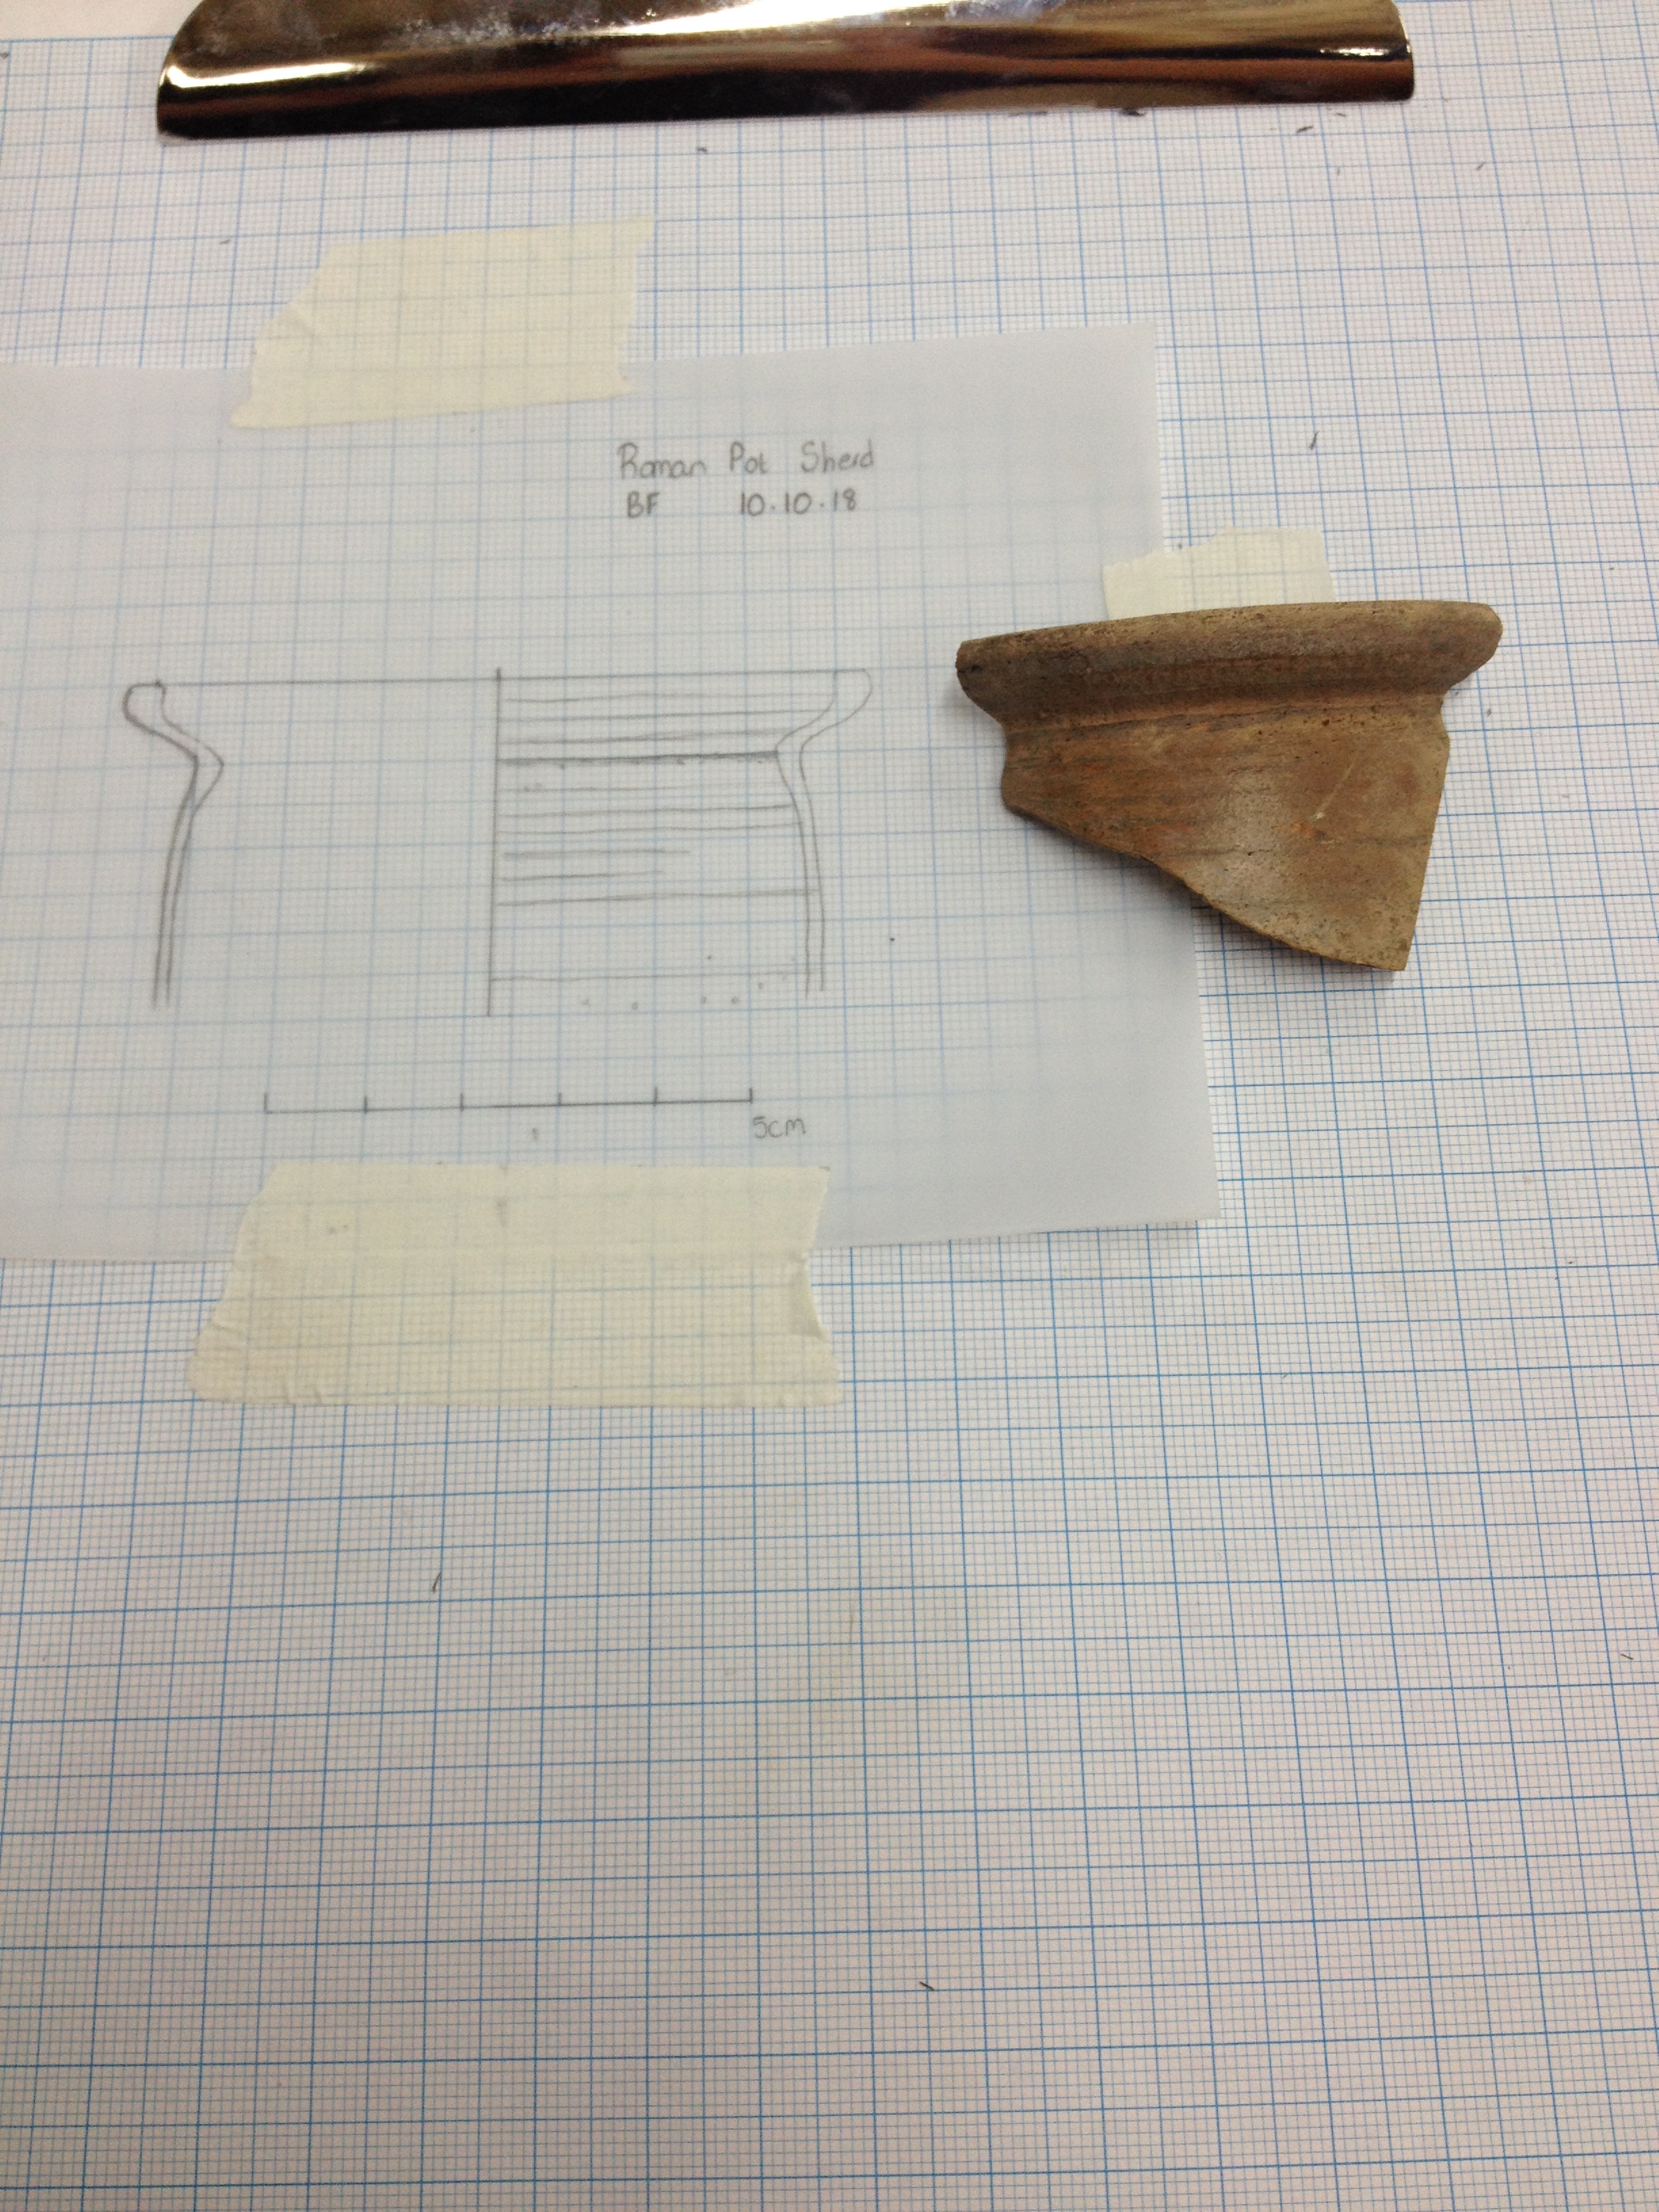
In my workshop I did a scale drawing of a piece of pot. This allowed me to practice the process. The piece of pot which I chose to draw was found at Malton which is the site which has been used for the archaeology field school for the last few years. It was nice to draw something from a site which I was involved with digging at.
The drawing process is something which I definitely need practice at! The piece of pot which I was drawing was a broken potsherd. I found it difficult as I didn’t have a top and bottom meaning I wasn’t entirely sure what size the completed piece of pottery would have been. I think having more practice would help me to be more confident about my drawing and make me feel less like I was guessing… I would like to have another attempt at drawing the same piece of pot because I should have drawn the shape of the outline on my drawing to show what I was basing my image on. In my drawing I added lines to the whole of the left side, I shouldn’t have done this because I cannot be sure that the pattern on my sherd would continue across the whole pot. Guessing at things like this could possibly change the whole interpretation of what my post would have been to a person looking at it in isolation without the physical sherd for reference.
The drawing process uses various methods to try and make the end result as accurate as possible. One of these methods was to place the rim of the post onto a radius chart. By lining the fragment you have up with the lines on the chart you can work out what the diameter of the pot would have been.
Radius Chart
Another method was to use a profile gauge to easily draw the outline of the pot sherd. You push the pot into the prongs leaving an impression which can be traced around:
Profile Gauge
Below is my final drawing alongside the piece of pot which I was representing:
Bibliography:
Morgan, C. and Wright, H. (2018). Pencils and Pixels: Drawing and Digital Media in Archaeological Field Recording. Journal of Field Archaeology, 43 (2), 136-151.
Hi, I’m Beth – a second year archaeology undergraduate at York.
I have created this blog for one of my modules which is called communicating archaeology.
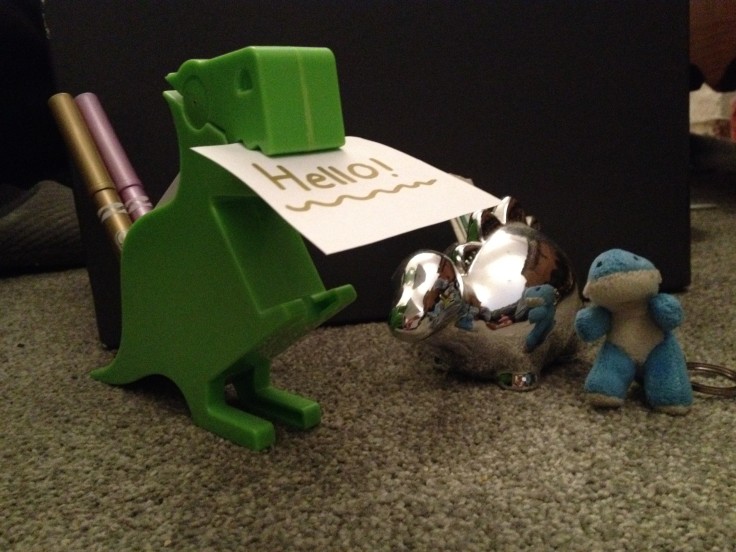
My blog is named ‘Death, digging and dinosaurs: the pastimes of an archaeologist’. This is because these are typical stereotypes associated with archaeology and while I do think they are cool – check out my cute dinosaur key ring, my desk tidy and money box! – I haven’t seen many skeletons, we don’t just dig and it is paleontologists not archaeologists that study dinosaurs.
In this blog I will be sharing some of the other aspects of archaeology such as illustration, photography and mapping.
For now though I will tell you a bit about the digs I have been on because they were fun.
To date I have been on four archaeological digs. My first was at a medieval farmhouse called Vinnimore farmhouse. The second was at Wooston Castle Hillfort. This is a scheduled ancient monument so it was very exciting to have the opportunity to be involved in this. I was then on a dig in Malton just outside the Roman fort as part of the University field school. Finally in the summer a Volunteered on a dig ran by Exeter University at a site called Ipplepen. Here are some pictures:
Vinnimore farm
Wooston Castle
Malton
Ipplepen
Outside of archaeology I am president of my university’s folk society which I created: I play the violin, tap dance and love a good ceilidh. I am also part of the pantomime society which is great fun. Below is a picture of me when I was multi-rolling as a mime and an orphan in our summer Pantomime – Anastasia.


")
")